|
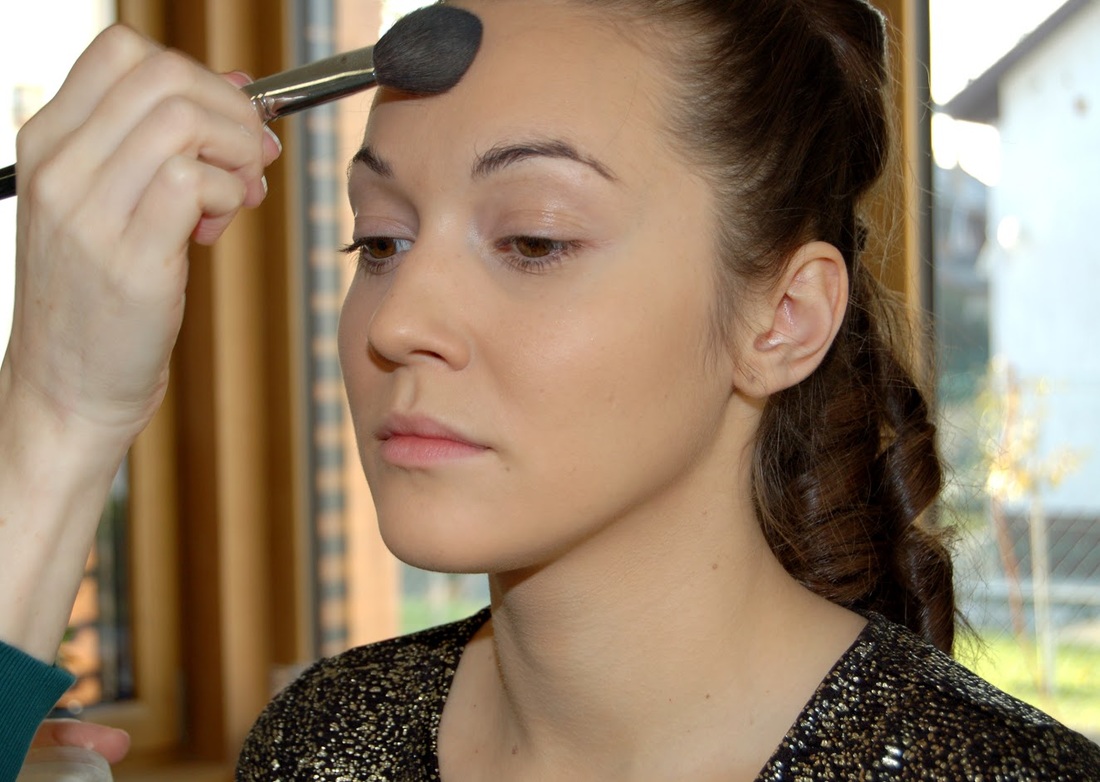
Anna before and after 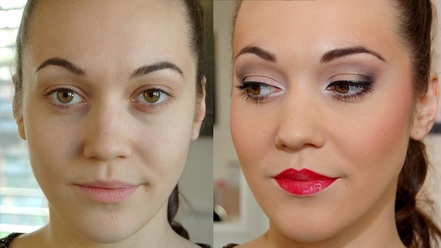 Glad you could drop by! Now you can follow our makeup tips step by step, we will create an elegant, festive makeup together with my professional makeup artist friend, Adrienn Safarcsik (More info: https://m.facebook.com/makeuparchtist/?__mref=message_bubble) If you don’t have too much time, but you are invited to Christmas events, you will be grateful for these genius tips. You will surely need some professional brushes, but it’s not a big deal after all. 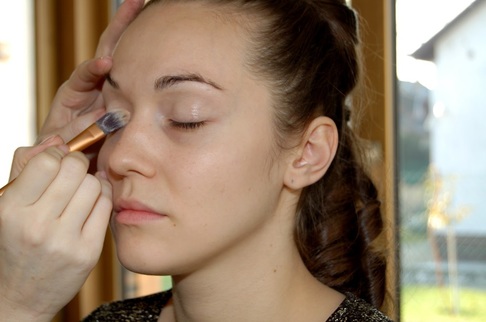 1. If you really want your makeup to last, start with a clean face. During winter time we pay more attention to hydrating, so right after cleansing, use a moisturizing cream or make-up base (thin layered). Apply the concealer to the eyelid, under the eye and under the nose (either with your finger or a brush), do not touch the eyebrows! How to choose a concealer? It depends on the dark circles under your eyes, if those are eg. lilac shades (cold color), use a yellow-brown concealer, because you can compensate the cold colors with warm ones. In the end tap it with your fingertips, in order to harmonize your skin. (We used MAC Pro Longwear Concealer) 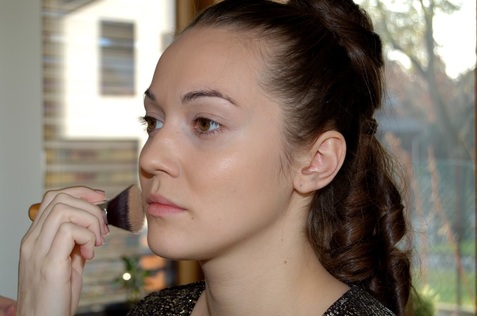 2. Apply foundation to the rest of your face, during winter time your skin needs to be moisturized, use a good foundation according to your skin type. How to get a neat, flawless skin? Use only a small amount and smoothly apply it with circular movements, touching your skin lightly. Skip the eyelid, that will be another chapter, but don't forget your neck, it's an important area if your would like to achieve a nice look. (We used MAC Studio Fix Fluid) 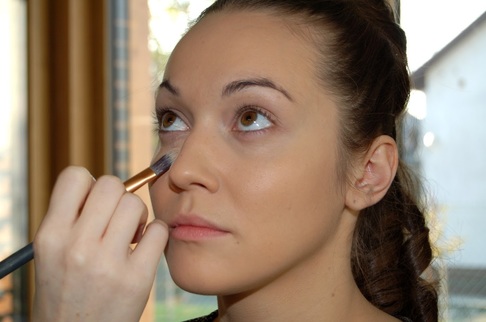 3. If the dark circles under your eyes haven't disappeared perfectly, then use a bit of foundation here too. Don't go too close to your eyes. 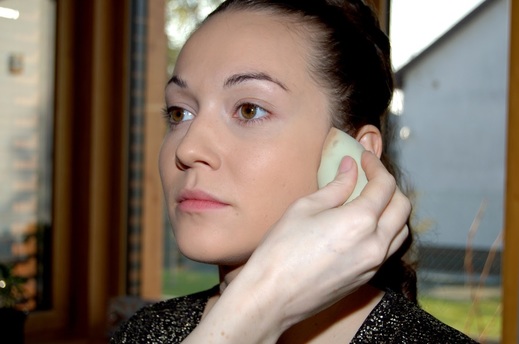 4. Do you know this little miracle, called „beauty blender? For those who struggle with acne and blemishes, this make-up tool is the perfect option, in order to help to achieve a flawless complexion. Wet the sponge under water until it grows in size and squeeze out excess water. Pump your foundation on the back of the hand and dip the sponge into the product, but don't drag it.
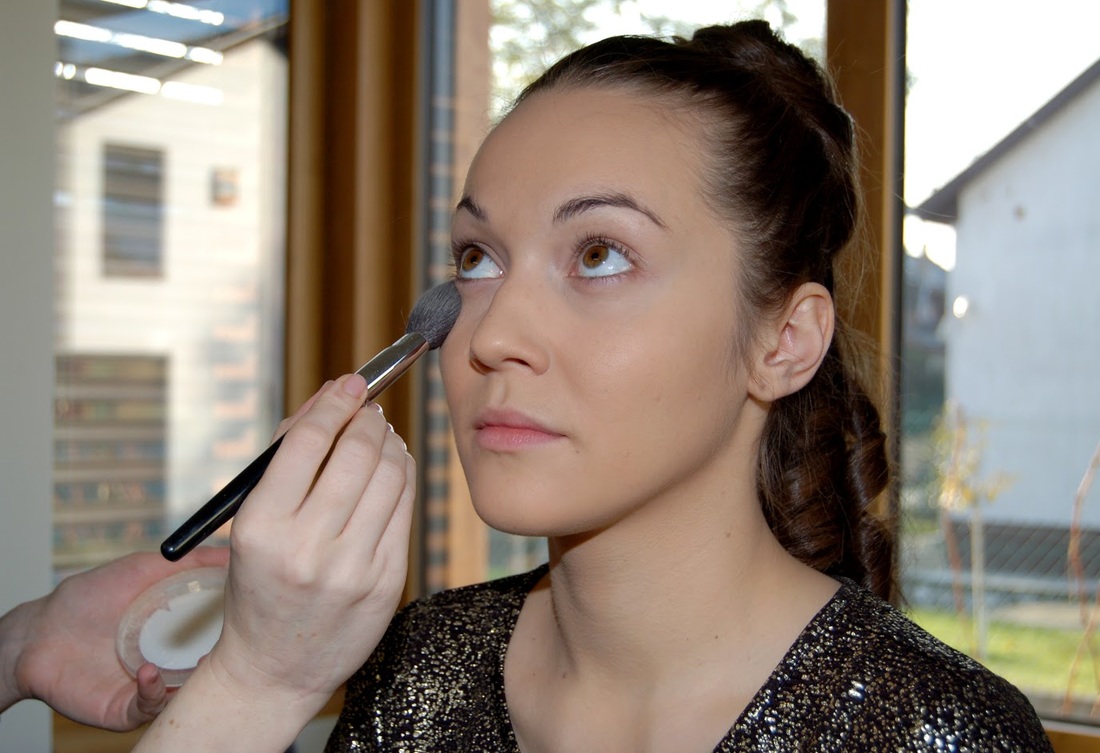
5. Finally we use transparent finishing powder (Kryolan TL11). It works for any skin tones and gives a natural finish. During the cold season don't overdo it, use it where your skin shines and skip the eyelid. 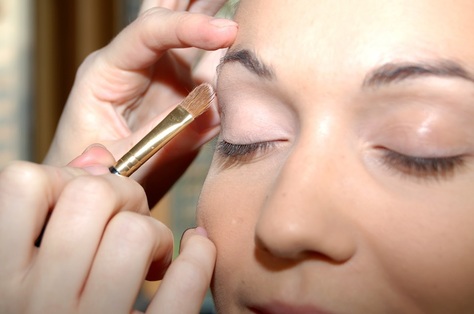 6. Now comes the eyelid. Let's start with the oil-free primer, apply it on the area where you will use eyeshadow and don't skip the root of the bottom eyelashes. There are so many brands on the market, choose a good quality, what's waterproof. You can only achieve a nice shaded make-up with eyelid base. Pay attention, it dries out very fast, once you opened it, close it very quickly. (We used MAC Painterly Pro Longwear Paint Pot)
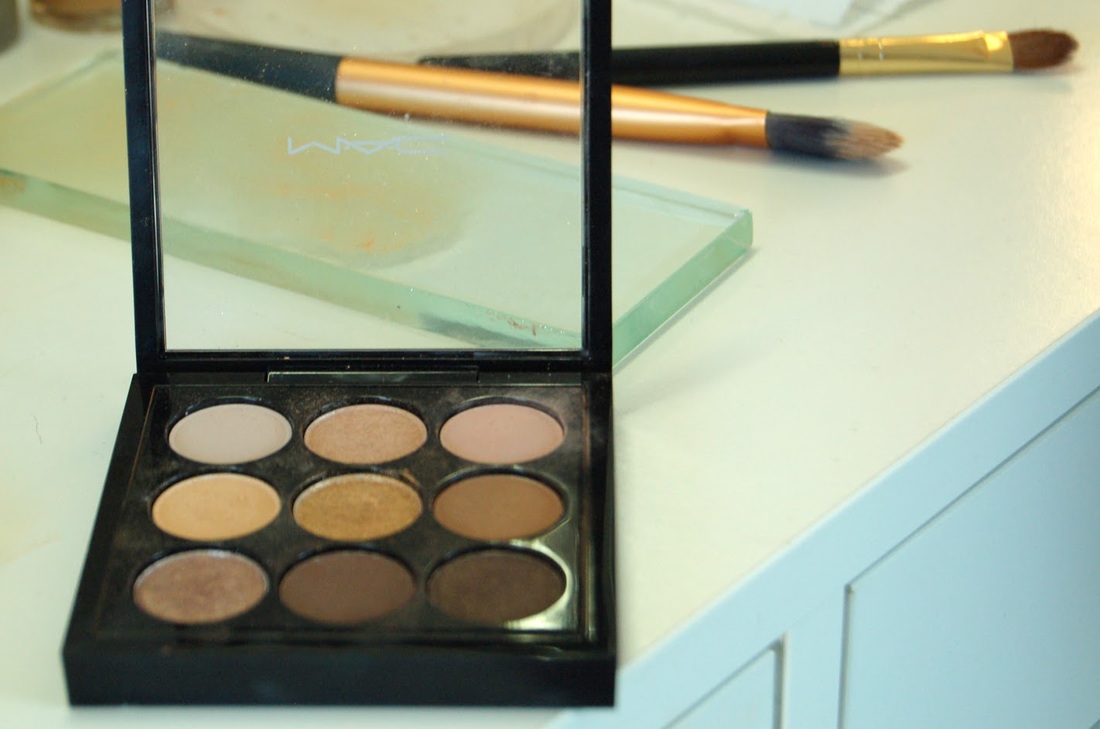
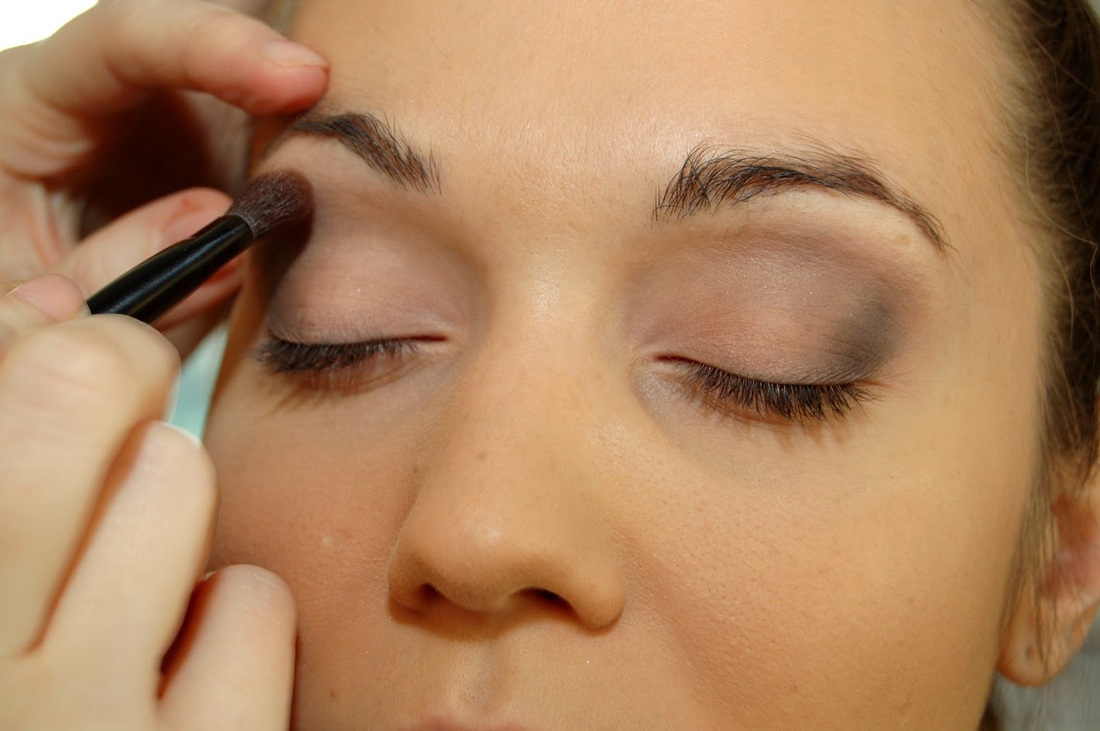
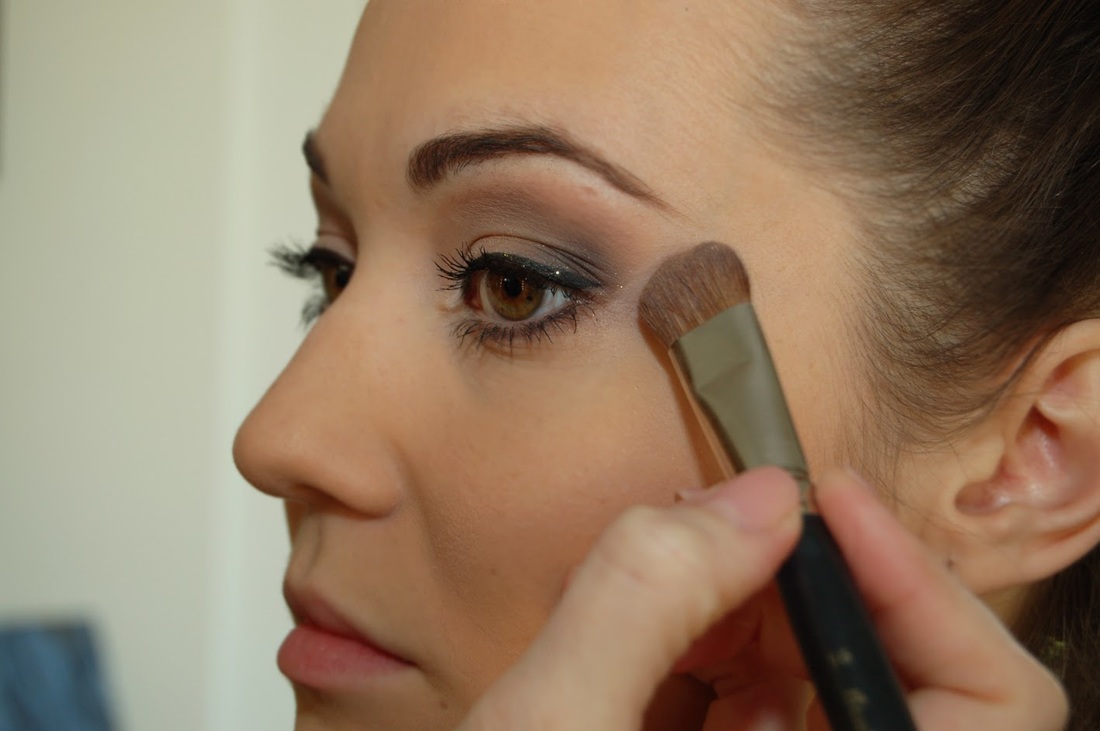
7. Take a medium brown eyeshadow, start to shade your eyelid from the outer corner with a shading brush. From here apply some to the brow bone too. This is how you „shadow” the eyelid. Never reach the eyebrows with this color! (We used MAC Amber Times Nine BA5)  8. Take your flat brush and apply a shiny, white color to the eyelid, starting from the inner corner of the eye, then start shading it towards the middle. The inner corner shall be the brightest. (We used Pupa Ombretto Compatto shiny white) 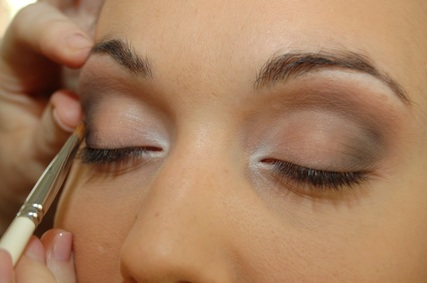 9. Use again your flat brush, apply a little more dark brown to the outer part of the eyelid, just slightly and also to the lower eyelashes.
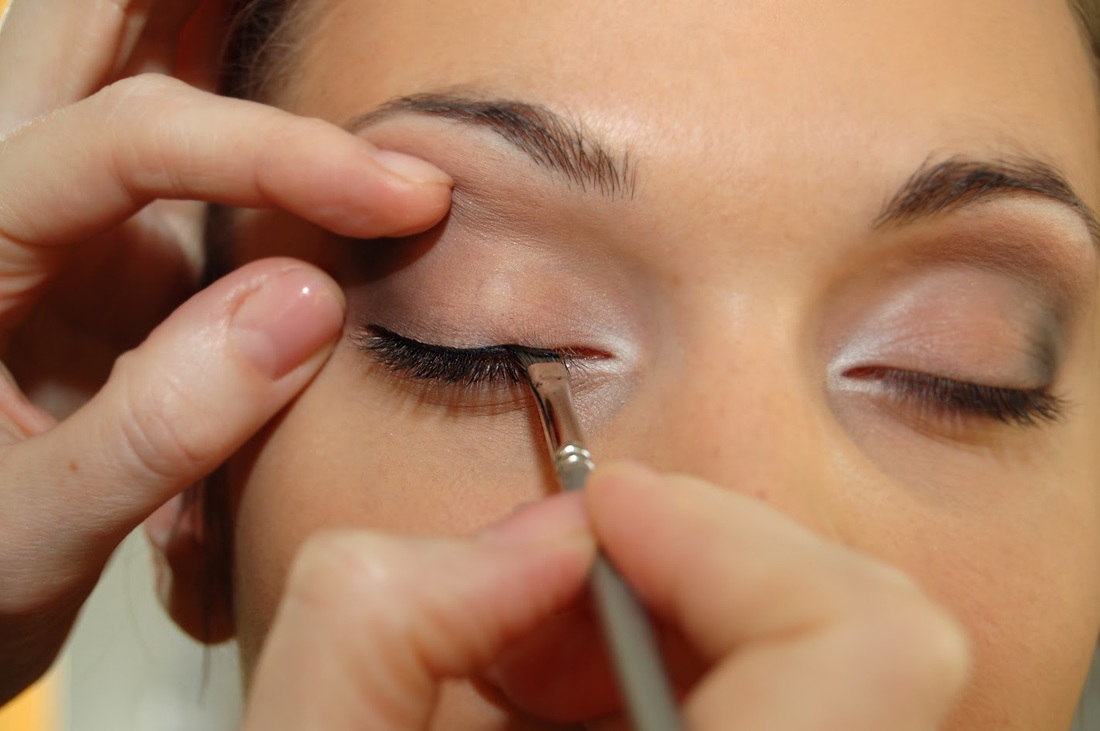
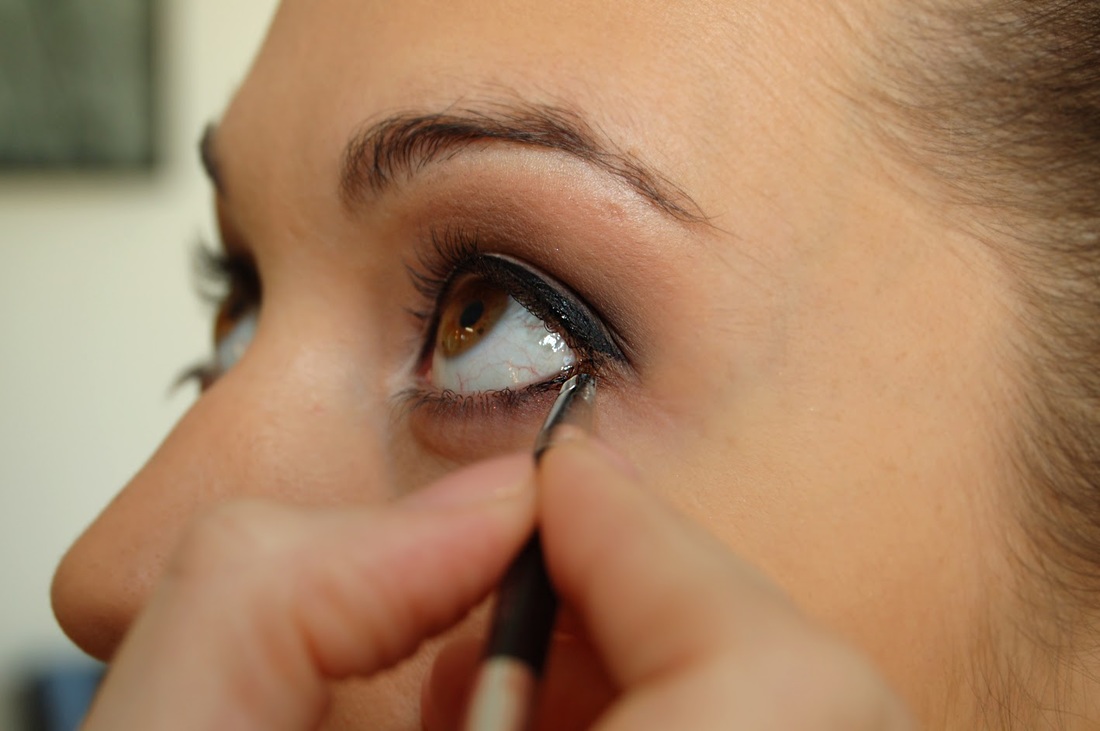
10. Now comes the gel eyeliner. Apply it with a thin, flat brush, start in the middle and when there is not much left on the brush, finish the end. How you create the cat eye depends on your eye shape. I suggest you starting with a shorter line, then you can always shape it afterwards. When there is still some gel left on the brush, very carefully apply it to the outer lower eyelashes, it definitely gives you a charming look. (Maybelline Lasting Drama Gel Eyeliner 01-Black)
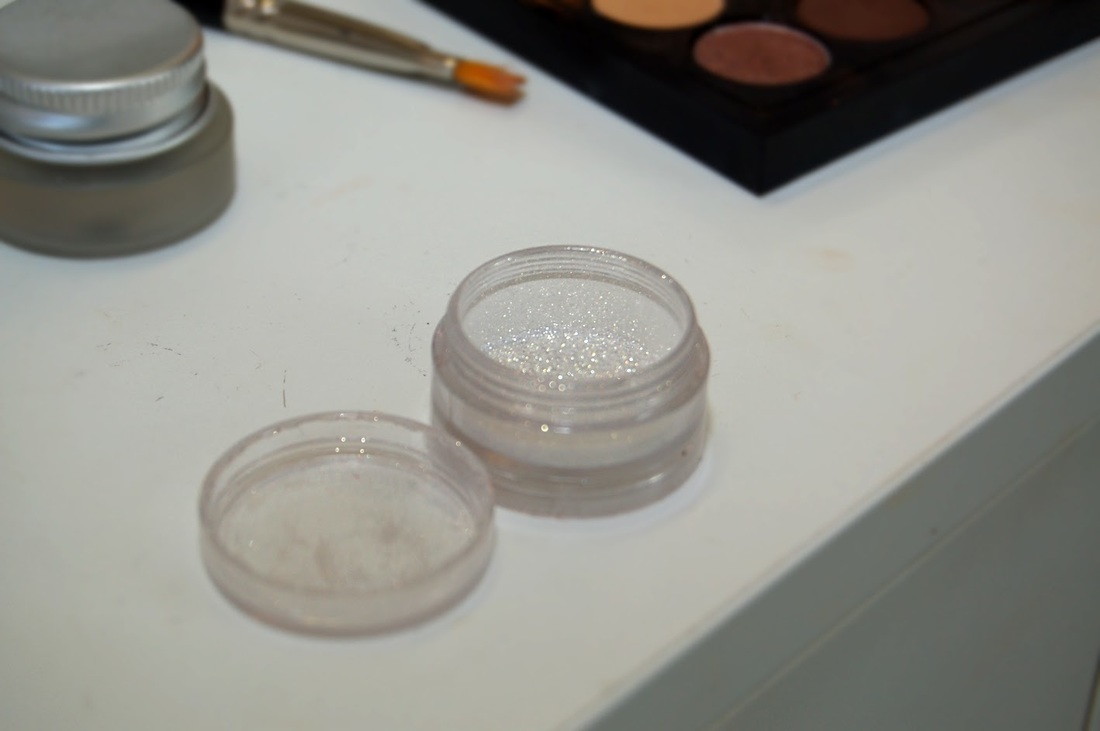
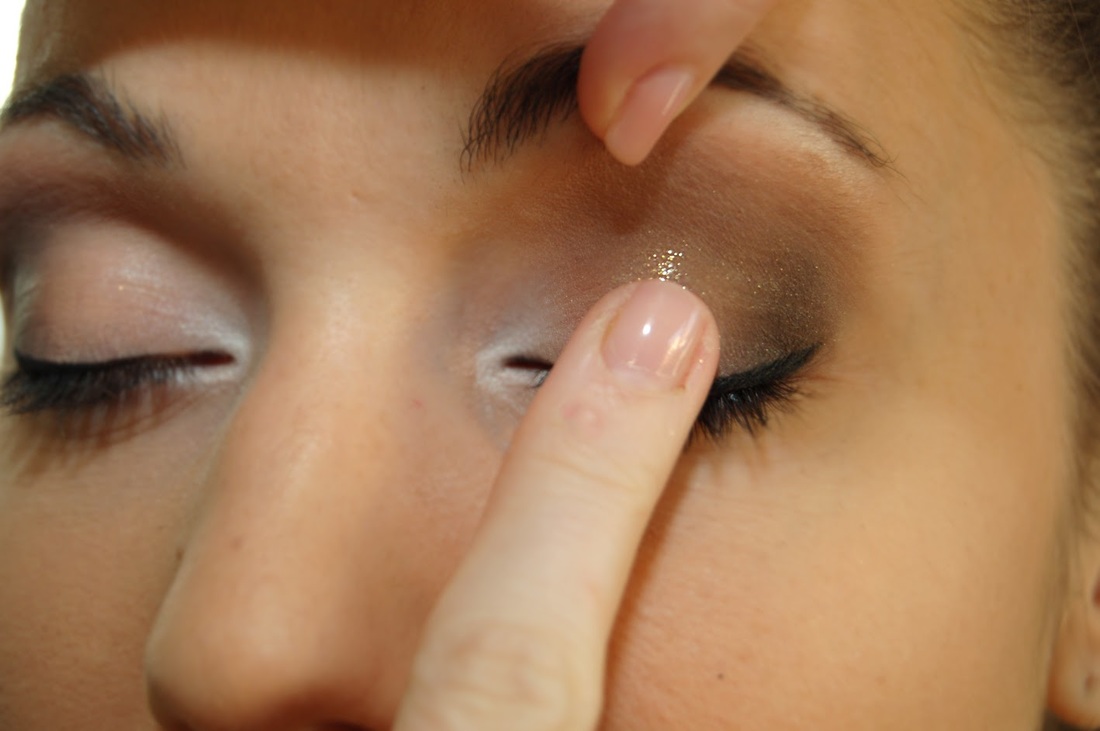
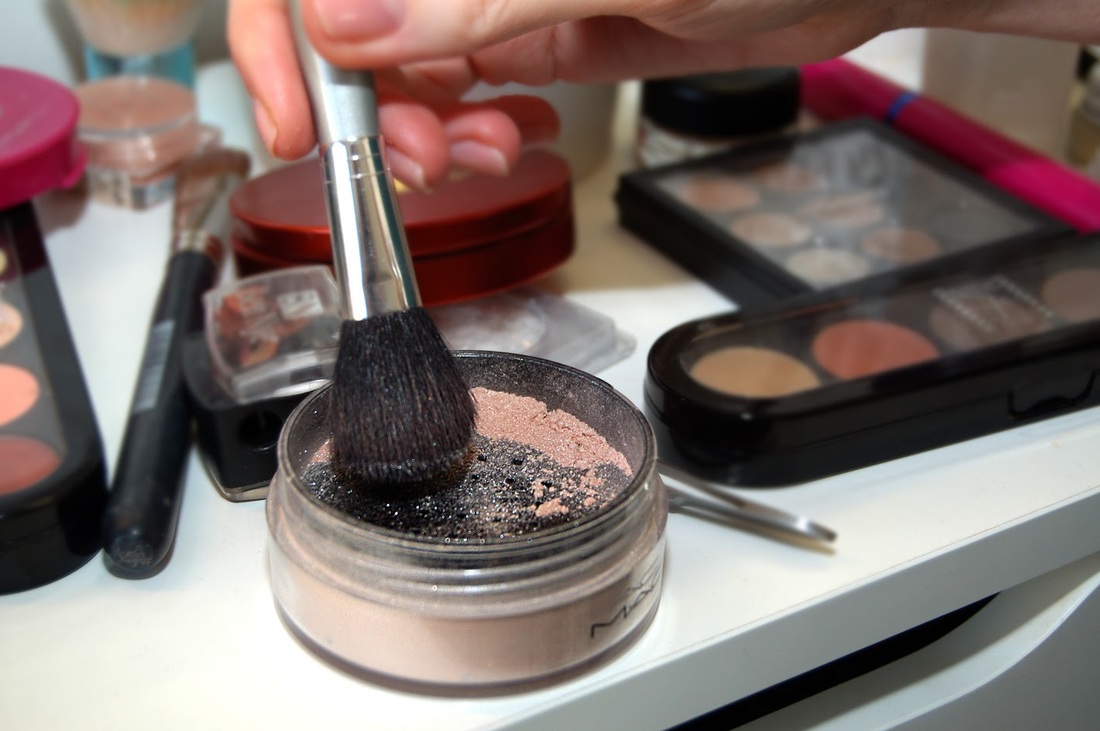
11. Use your fingertips to apply the glitter carefully to the middle of the eyelid first, then apply everywhere. The middle of your eyelid shall be the brightest. Such glitter you can buy in drug store or makeup shops. 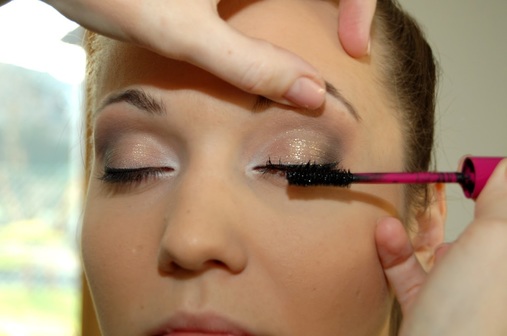 12. We used black mascara. This type of makeup looks good with a double layered mascara as well, with this technique you can reach the desired false lashes effect. The bottom lashes shall be painted too, instead of vertical movements, use horizontal ones. In case you messed it up a little, wait a few minutes under it gets dry, then remove it with an ear cleaning stick. 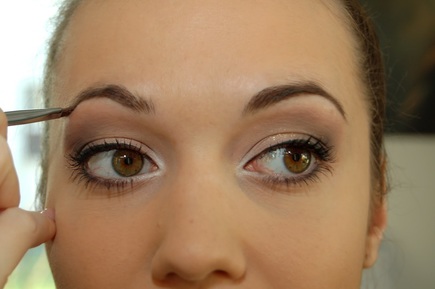 13. The best way to shape your eyebrows is a powder, the color depends on your eyebrows. Eyebrow brush is the essential tool for precision application of brow products. The angled cut brush is perfect to fill-in arches with brow powder or for applying liner. Under the eyebrows use a white highlighter in order to highlight the arc (1mm thick).
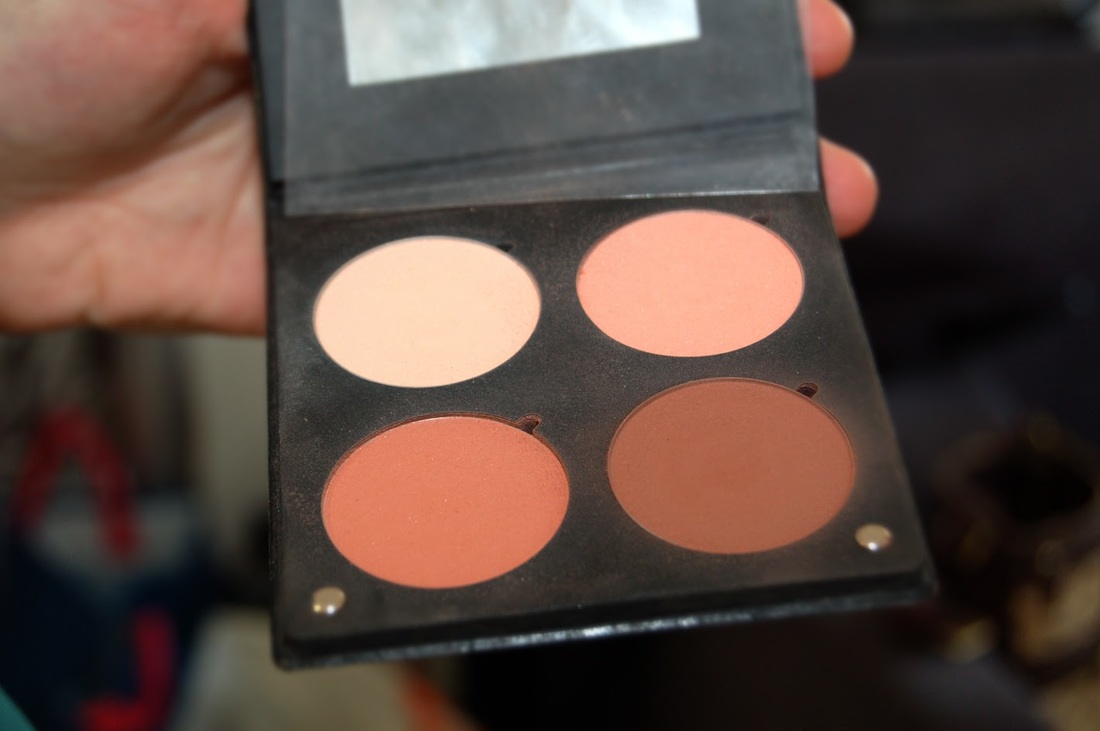
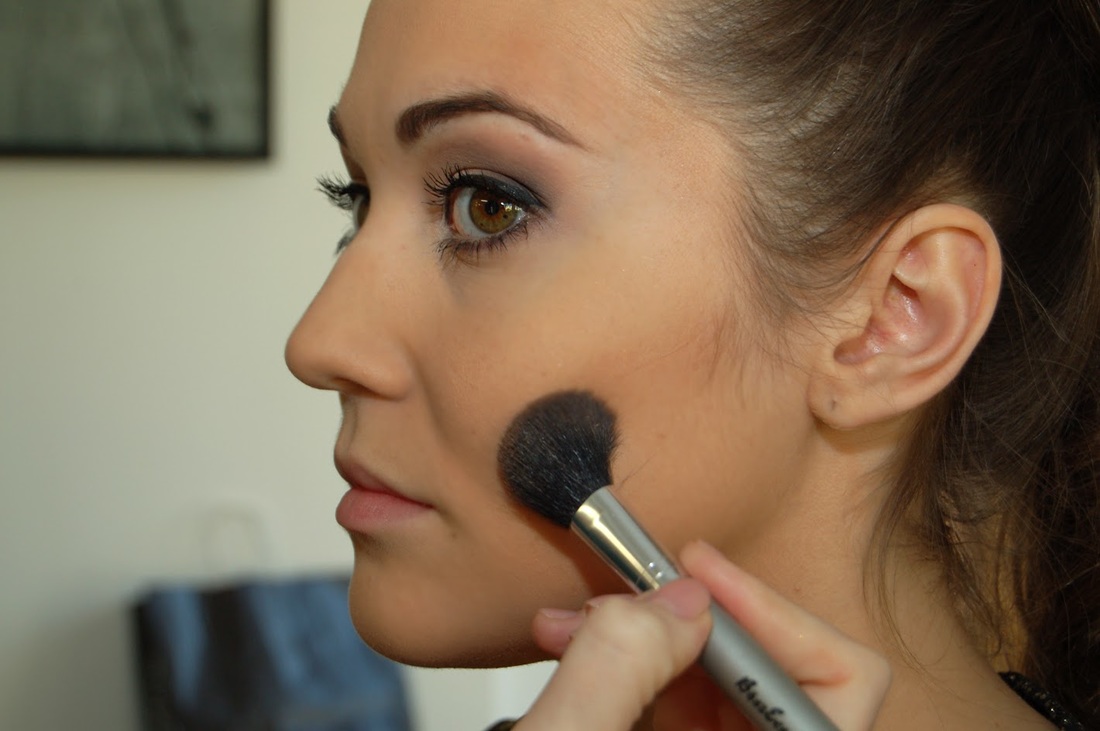
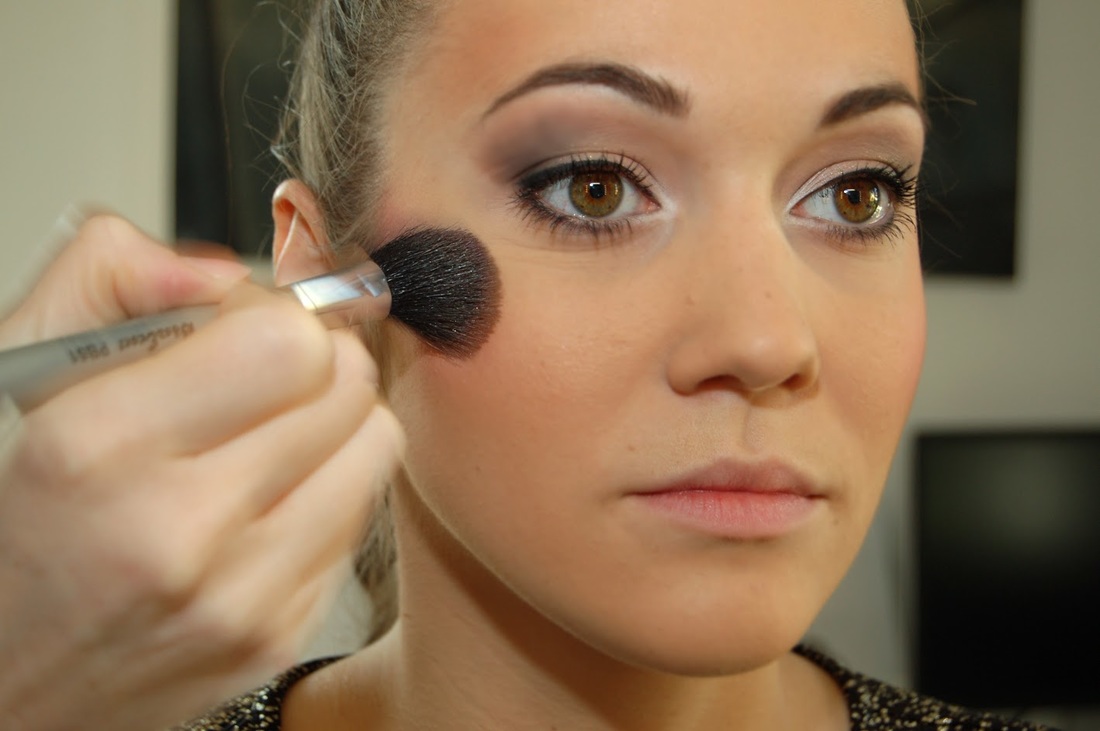
14. Blush helps to make your face glow, but it's important to avoid overdoing the look. Blush brush is the best way to apply this product, we used a palette with different color shades (Atelier Palette 4 blush 3D BL3DN). Highlight your cheekbone first, apply a lighter shade to the top of the bones and to the side of the eyes. Use a brown color under the cheekbone and highlight your bones with a blush.
15. Since we are getting ready for a festive Christmas party/New Year's Eve party, you may add a little glitter or highlighter to the blush. We used MAC Silver Dusk. 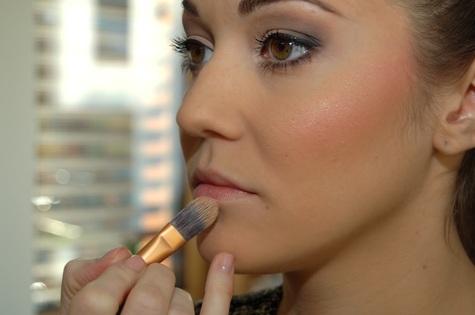 16. How to apply foundation for long-lasting lipsticks? Applying a foundation on the lips will help your lip color stay in place and not smudge easily. If you use a lip gloss, this step is not necessary.
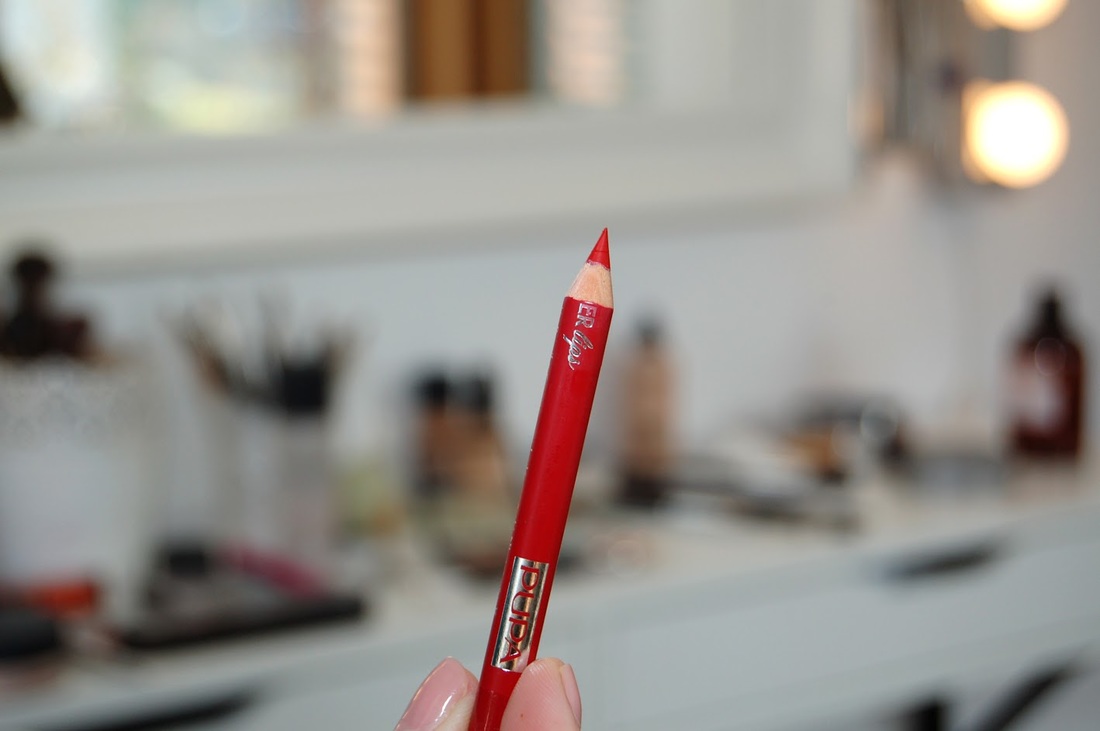
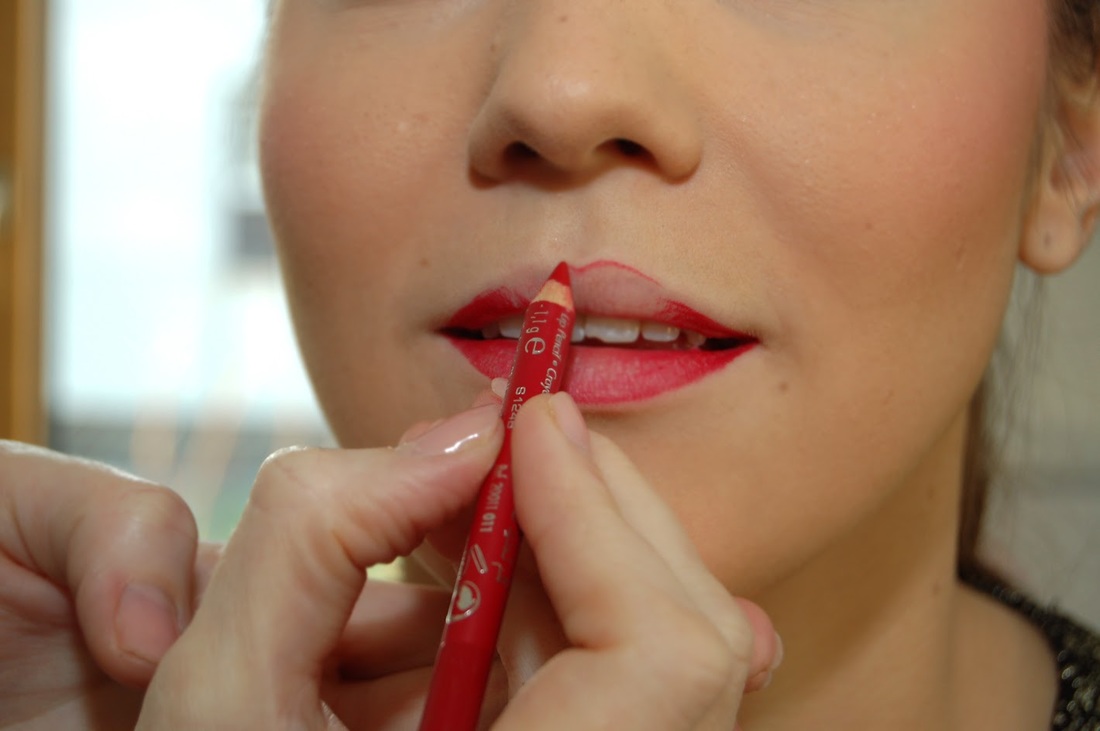
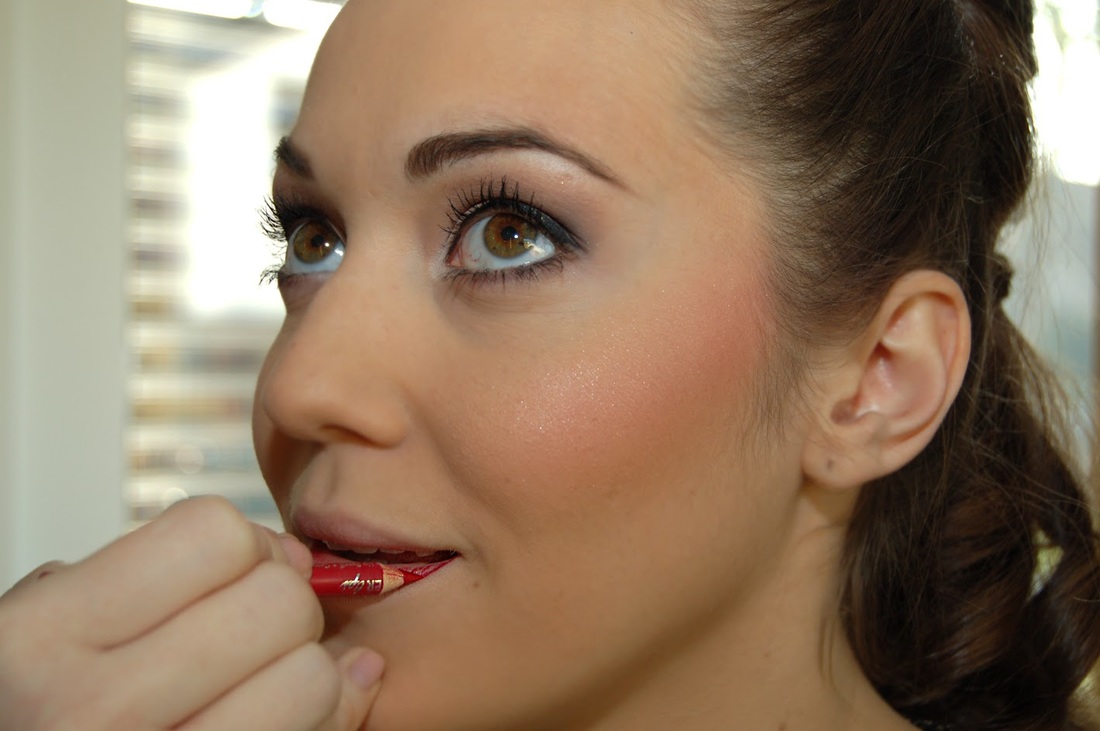
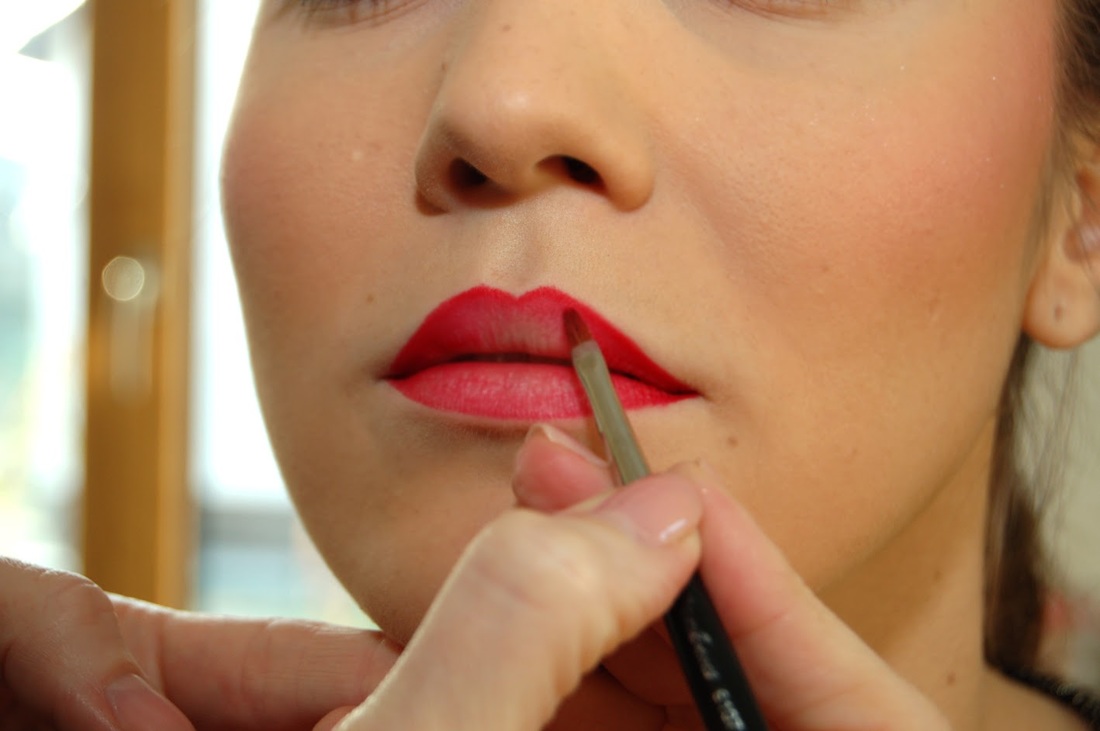
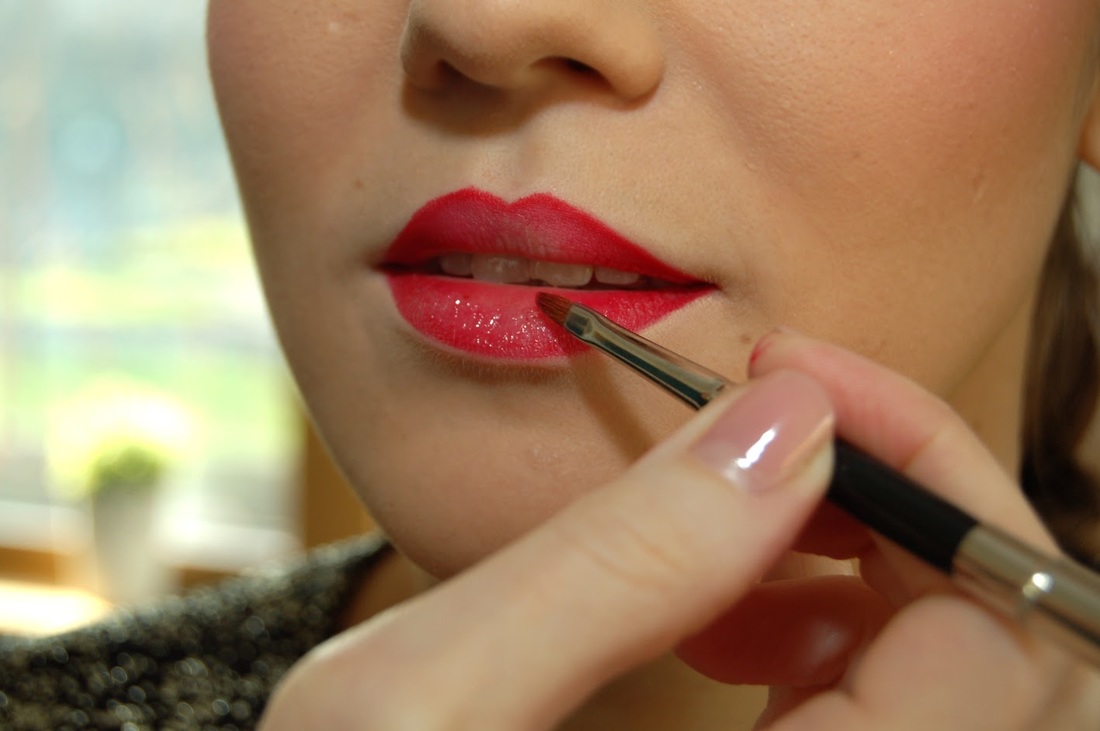
17. Start with a lip pencil, it's designed for shaping, lining or filling in lips. In our case the corner of the lip is darker and we applied the lighter shade in the middle, that's what we call Ombre lips. Next step is the lip brush, it usually has a dome shape and is useful to apply and blend lip colors . Your lip shape plays a big role in what lipstick shades you should go for. Consider using a brighter shade of lipstick if you have thin lips. It's important to feel comfortable in your own skin while wearing such a Christmas makeup. 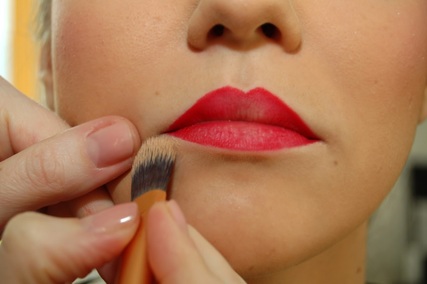 18. In the last step we create a perfect lip with some more foundation following the natural lip line.
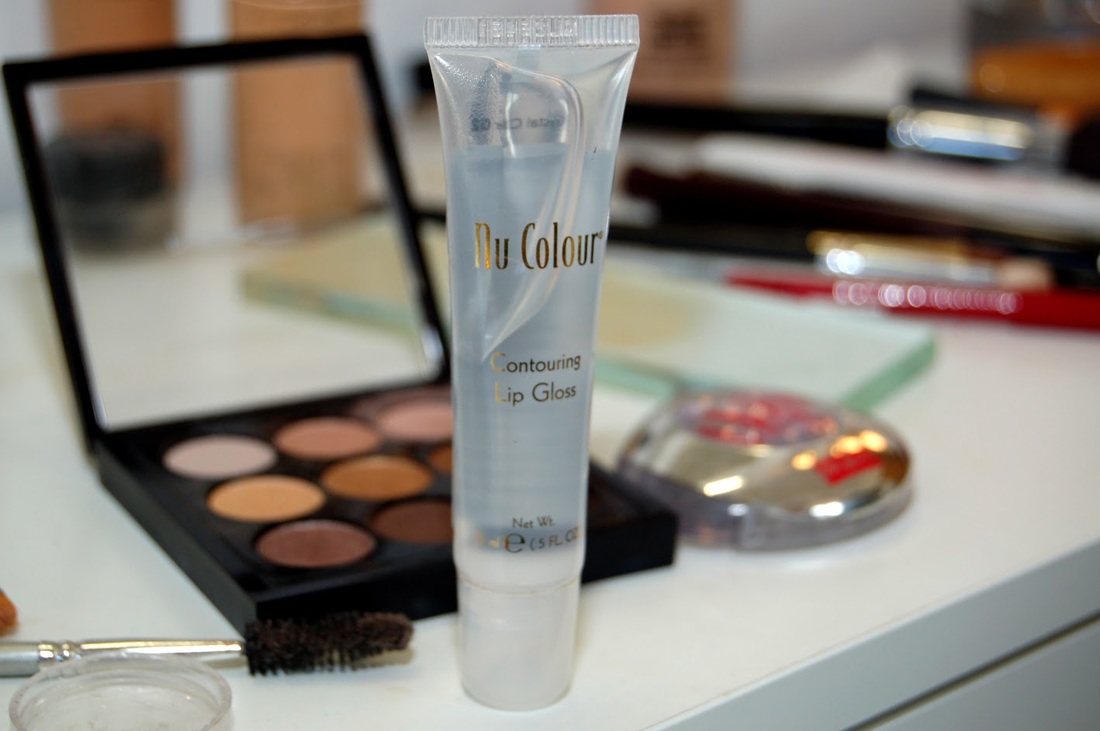
19. Finally apply a high-gloss, clear lip gloss, the corner shall be matte finish, the makeup will be durable if you only apply lip gloss to the middle.
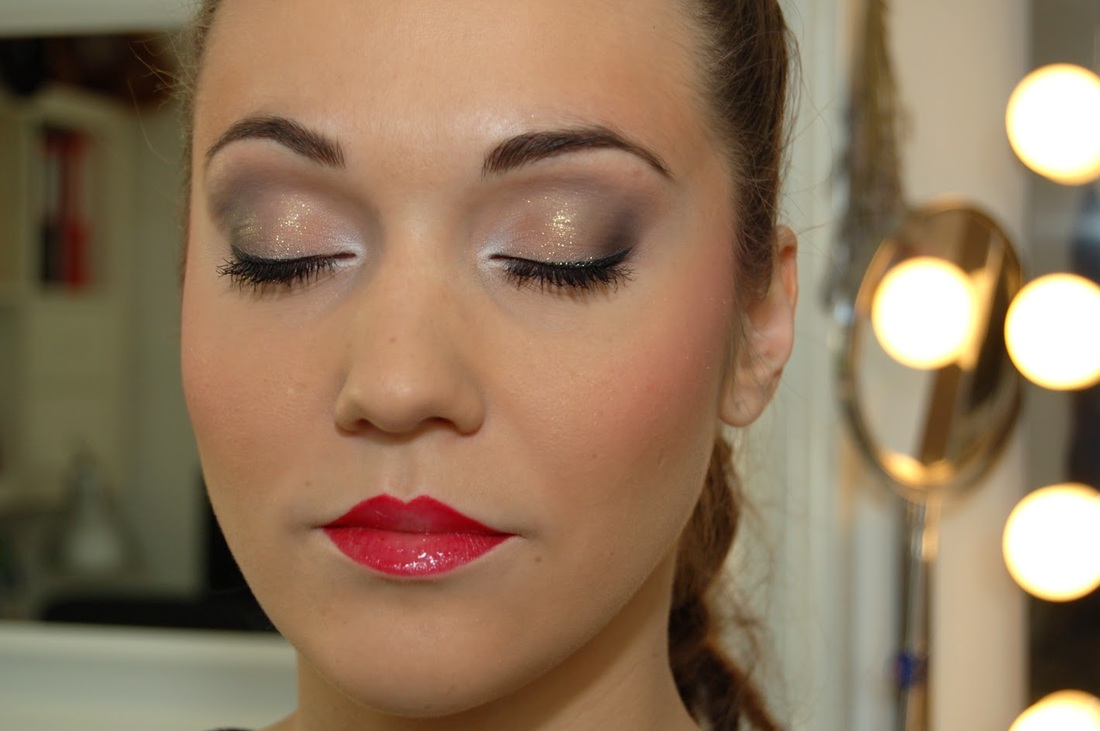
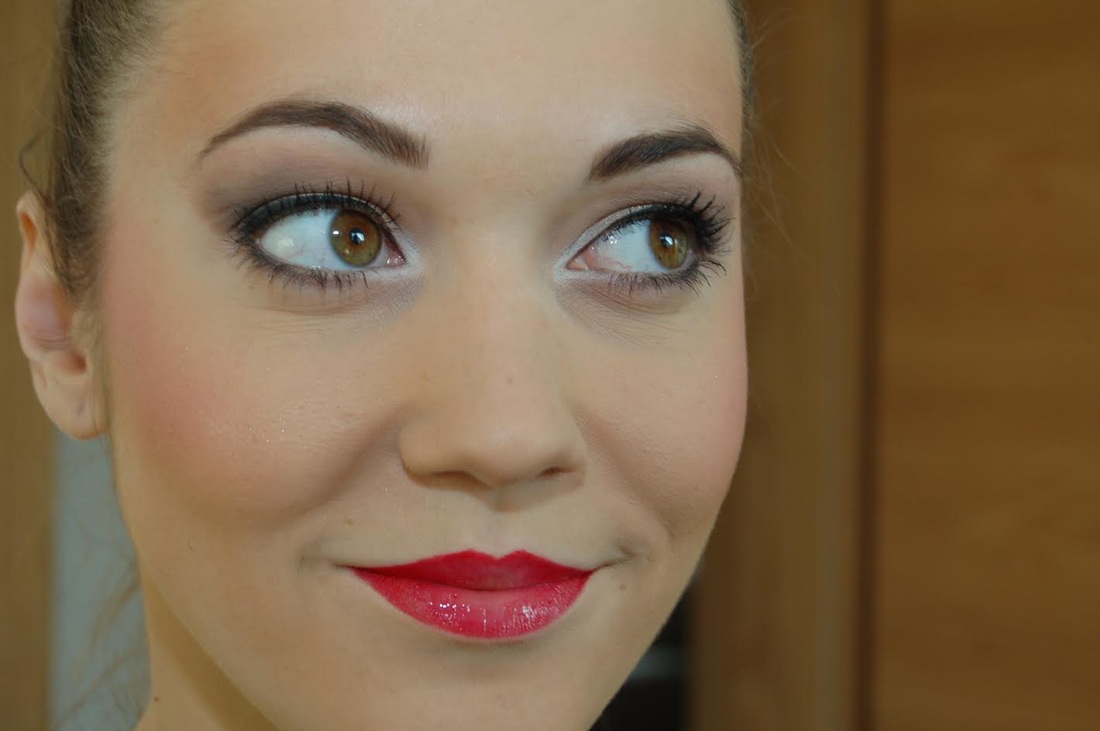
Here is the final result: Festive, glamorous look. How do you like it? I hope you found these tips useful.
1 Comment
|
Archives
May 2019
|

 RSS Feed